Creating and exporting video clips
Video and audio clips are the central objects of MoviePy. In this section we present the different sorts of clips, how to create them, and how to write them to a file. For informations on modifying a clip (cuts, effects, etc.), see Clips transformations and effects. For how to put clips together see Mixing clips and to see how to preview clips before writing a file, refer to How to be efficient with MoviePy.
The following code summarizes the base clips that you can create with moviepy:
# VIDEO CLIPS
clip = VideoClip(make_frame, duration=4) # for custom animations (see below)
clip = VideoFileClip("my_video_file.mp4") # or .avi, .webm, .gif ...
clip = ImageSequenceClip(['image_file1.jpeg', ...], fps=24)
clip = ImageClip("my_picture.png") # or .jpeg, .tiff, ...
clip = TextClip("Hello !", font="Amiri-Bold", fontsize=70, color="black")
clip = ColorClip(size=(460,380), color=[R,G,B])

# AUDIO CLIPS
clip = AudioFileClip("my_audiofile.mp3") # or .ogg, .wav... or a video !
clip = AudioArrayClip(numpy_array, fps=44100) # from a numerical array
clip = AudioClip(make_frame, duration=3) # uses a function make_frame(t)
The best to understand these clips is to read the full documentation for each in the Reference Manual. The next sections In this section we see how to create clips, (for instance from video or audio files), how to mix them together, and how to write them to a file.
Categories of video clips
Video clips are the building blocks of longer videos. Technically, they are clips with a clip.get_frame(t) method which outputs a HxWx3 numpy array representing the frame of the clip at time t. There are two main categories: animated clips (made with VideoFileClip and VideoClip) and unanimated clips which show the same picture for an a-priori infinite duration (ImageClip, TextClip,``ColorClip``). There are also special video clips call masks, which belong to the categories above but output greyscale frames indicating which parts of another clip are visible or not. A video clip can carry around an audio clip (clip.audio) which is its soundtrack, and a mask clip.
VideoClip
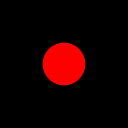
VideoClip is the base class for all the other video clips in MoviePy. If all you want is to edit video files, you will never need it. This class is practical when you want to make animations from frames that are generated by another library. All you need is to define a function make_frame(t) which returns a HxWx3 numpy array (of 8-bits integers) representing the frame at time t. Here is an example with the graphics library Gizeh:
import gizeh
import moviepy.editor as mpy

def make_frame(t):
    surface = gizeh.Surface(128,128) # width, height
    radius = W*(1+ (t*(2-t))**2 )/6 # the radius varies over time
    circle = gizeh.circle(radius, xy = (64,64), fill=(1,0,0))
    circle.draw(surface)
    return surface.get_npimage() # returns a 8-bit RGB array

clip = mpy.VideoClip(make_frame, duration=2) # 2 seconds
clip.write_gif("circle.gif",fps=15)
Note that clips make with a make_frame do not have an explicit frame rate, so you must provide a frame rate (fps, frames er second) for write_gif and write_videofile, and more generally for any methods that requires iterating through the frames.
VideoFileClip
A VideoFileClip is a clip read from a video file (most formats are supported) or a GIF file. You load the video as follows:
myclip = VideoFileClip("some_video.avi")
myclip = VideoFileClip("some_animation.gif")
Note that these clips will have an fps (frame per second) attribute, which will be transmitted if you do small modifications of the clip, and will be used by default in write_videofile, write_gif, etc. For instance:
myclip = VideoFileClip("some_video.avi")
print (myclip.fps) # prints for instance '30'
# Now cut the clip between t=10 and 25 secs. This conserves the fps.
myclip2 = myclip.subclip(10, 25)
myclip2.write_gif("test.gif") # the gif will have 30 fps
For more, see VideoFileClip.
ImageSequenceClip
This is a clip made from a series of images, you call it with
clip = ImageSequenceClip(images_list, fps=25)
where images_list can be either a list of image names (that will be played) in that order, a folder name (at which case all the image files in the folder will be played in alphanumerical order), or a list of frames (Numpy arrays), obtained for instance from other clips.
When you provide a folder name or list of file names, you can choose load_images=True to specify that all images should be loaded into the RAM. This is only interesting if you have a small number of images that will be each used more than once (e.g. if the images form a looping animation).
ImageClip
An ImageClip is a video clip that always displays the same image. You can create one as follows:
myclip = ImageClip("some_picture.jpeg")
myclip = ImageClip(somme_array) # a (height x width x 3) RGB numpy array
myclip = some_video_clip.to_ImageClip(t='01:00:00') # frame at t=1 hour.
For more, see ImageClip.
Two examples of ImageClip shown below are the TextClip and ColorClip
TextClip
Generating a TextClip requires to have ImageMagick installed and (for windows users) linked to MoviePy, see the installation instructions.
Here is how you make a textclip (you won’t need all these options all the time):
myclip = TextClip("Hello", font='Amiri-Bold')
The font can be any font installed on your computer, but ImageMagick will have specific names for it. For instance the normal Amiri font will be called Amiri-Regular while the Impact font will be called Impact-Normal. To get a list of the possible fonts, type TextClip.list('font'). To find all the font names related to a given font, use for instance
TextClip.search('Amiri', 'font') # Returns all font names containing Amiri
Note also that the use of a stroke (or contour) will not work well on small letters, so if you need a small text with a contour, it is better to generate a big text, then downsize it:
myclip = TextClip("Hello", fontsize=70, stroke_width=5).resize(height=15)
TextClips have many, many options: alignment, kerning (distance between the letters), stroke size, background, word wrapping, etc. see TextClip for more.
Mask clips
A mask is a special video clip which indicates which pixels will be visible when a video clip carrying this mask will be composed with other video clips (see Mixing clips). Masks are also used to define transparency when you export the clip as GIF file or as a PNG.
The fundamental difference between masks and standard clips is that standard clips output frames with 3 components (R-G-B) per pixel, comprised between 0 and 255, while a mask has just one composant per pixel, between 0 and 1 (1 indicating a fully visible pixel and 0 a transparent pixel). Seen otherwise, a mask is always in greyscale.
When you create or load a clip that you will use as a mask you need to declare it:
maskclip = VideoClip(makeframe, duration=4, ismask=True)
maskclip = ImageClip("my_mask.jpeg", ismask=True)
maskclip = VideoFileClip("myvideo.mp4", ismask=True)
In the case of video and image files, if these are not already black and white they will be converted automatically.
Then you attach this mask to a clip (which must have the same dimensions) with myclip.set_mask(maskclip).
Some image formats like PNG support transparency with an alpha layer, which MoviePy will use as a mask:
myclip = ImageClip("image.png", transparent=True) # True is the default
myclip.mask # <- the alpha layer of the picture.
Any video clip can be turned into a mask with clip.to_mask(), and a mask can be turned to a standard RGB video clip with my_mask_clip.to_RGB().
Masks are treated differently by many methods (because their frames are different) but you can do with a mask pretty much everything you can do with a standard clip: you can cut it, edit it, preview it, write it to a video file, make snapshots, etc.
Exporting video clips
Video files (.mp4, .webm, .ogv…)
To write a clip as a video file, use
my_clip.write_videofile("movie.mp4") # default codec: 'libx264', 24 fps
my_clip.write_videofile("movie.mp4",fps=15)
my_clip.write_videofile("movie.webm") # webm format
my_clip.write_videofile("movie.webm",audio=False) # don't render audio.
MoviePy has default codec names for the most common file extensions. If you want to use exotic formats or if you are not happy with the defaults you can provide the codec with codec='mpeg4' for instance. There are many many options when you are writing a video (bitrate, parameters of the audio writing, file size optimization, number of processors to use, etc.). Please refer to write_videofile() for more.
Sometimes it is impossible for MoviePy to guess the duration attribute of the clip (keep in mind that some clips, like ImageClips displaying a picture, have a priori an infinite duration). Then, the duration must be set manually with clip.set_duration:
# Make a video showing a flower for 5 seconds
my_clip = Image("flower.jpeg") # has infinite duration
my_clip.write_videofile("flower.mp4") # Will fail ! NO DURATION !
my_clip.set_duration(5).write_videofile("flower.mp4") # works !
Animated GIFs
To write your video as an animated GIF, use
my_clip.write_gif('test.gif', fps=12)
Note that this requires ImageMagick installed. Otherwise you can also create the GIF with ffmpeg by adding the option program='ffmpeg', it will be much faster but won’t look as nice and won’t be optimized.
There are many options to optimize the quality and size of a gif. Please refer to write_gif().
Note that for editing gifs the best way is to preview them in the notebook as explained here: ipython_display
For examples of use, see this blog post for informations on making GIFs from video files, and this other post for GIF animations with vector graphics.
Export images
You can write a frame to an image file with
myclip.save_frame("frame.png") # by default the first frame is extracted
myclip.save_frame("frame.jpeg", t='01:00:00') # frame at time t=1h
If the clip has a mask it will be exported as the alpha layer of the image unless you specify withmask=False.